[DL] CNN - 2
CNN 기초 코딩(TF1.5)
이미지를 가져와 CONVOLUTION 및 POOLING 처리에 대해서 알아본다.
Library
사용 Library에 대해서 알아본다.
import numpy as np
import tensorflow as tf
import matplotlib.pyplot as plt
import matplotlib.image as img
Convolution
흑백이미지를 가져와 convolution을 수행해 본다.
이미지 불러오기 및 add_subplot
fig = plt.figure(figsize=(10, 10))
ax1 = fig.add_subplot(1,2,1)
ax2 = fig.add_subplot(1,2,2)

ori_img = img.imread('./image/teddy_bear') # 구글에서 흑백이미지를 찾아 가져왔다.
ax1.imshow(ori_img)
plt.show()                                 # ax2를 함께 볼때는 이부분을 지우고 마지막으로 옮긴다.
print('ori_img의 shape : {}'.format(ori_img.shape))
## ori_img의 shape : (428, 640, 3)
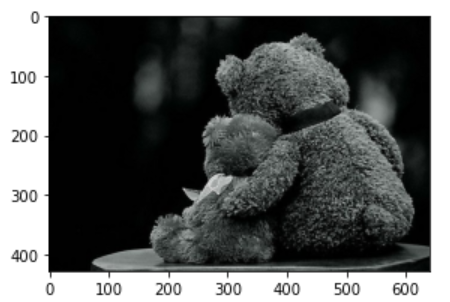
image 차원 및 dtype 변경
convolution 연산을 수행하기 위해서는 4차원 데이터가 필요하다. (위에서 확인해보면 3차원 이미지)
따라서 (이미지 개수, height, weight, color) 형식으로 바꿔야 한다.
또한 흑백이미지를 사용할것이기 때문에 color수를 1로 바꿔주어야 한다.
- 4차원으로 변환
input_img = ori_img.reshpae((1,) + ori_img.shape) # tuple 연산
print('input_img의 shape : {}'.format(input_img.shape))
## input_img의 shape : (1, 428, 640, 3)
- input_img의
dtype변경
input_img = input_img.astype(np.float32)
- input_img의 color 수 1로 변경
input_img = input_img[:,:,:,:1]
print('input_img의 shape : {}'.format(input_img.shape))
## input_img의 shape : (1, 428, 640, 1)
filter 만들기
(filter height, filter width, filter channel, filter 개수) 의 shape을 지니는 filter를 만들어야 한다.
주로 3x3 크기가 많이 사용 된다. 따라서 shape 이 (3, 3, 1, 1)인 filter를 만든다.
weight = np.array([[[[-1]],[[0]],[[1]]],
                   [[[-1]],[[0]],[[1]]],
                   [[[-1]],[[0]],[[1]]]])

print('weight의 shape : {}'.format(weight.shape))
## weight의 shape : (3, 3, 1, 1)
tensorflow를 이용한 convolution
conv2d를 이용해 convolution을 진행한다. image, weight 순서로 입력값이 들어가고 추가 option으로 strides 및 padding을 준다.
- stride 1인 경우
sess = tf.Session()

conv2d = tf.nn.conv2d(input_img, weight, strides=[1, 1, 1, 1], padding='VALID')
result = sess.run(conv2d)
print('result의 shape : {}'.format(result.shape))
## result의 shape : (1, 426, 638, 1)
- stride 2인 경우
conv2d = tf.nn.conv2d(input_img, weight, strides=[1, 2, 2, 1], padding='VALID')

result = sess.run(conv2d)
print('result의 shape : {}'.format(result.shape))
## result의 shape : (1, 213, 319, 1)
결과 이미지 확인
convoluton 취했을 때의 이미지를 확인해 본다. 이를 위해서는 이미지 개수를 나타내는 부분을 없애주어야 한다.
result_img = result[0,:,:,:]

ax2 = fig.add_subplot(1,2,2)
ax2.imshow(result_img)
plt.show()

MaxPooling
tensorflow의
nn.max_pool을 활용해 maxpooling을 해본다.
이미지data 만들기
img = np.array([[[[1],[1],[1],[1]],
                 [[1],[1],[1],[1]],
                 [[1],[1],[1],[1]],
                 [[1],[1],[1],[1]]]], dtype=np.float32)
pooling
pool = tf.nn.max_pool(img, ksize=[1, 2, 2, 1], strides=[1, 2, 2, 1], padding='VALID')
result = sess.run(pool)
print(pool_result.shape)
## (1, 2, 2, 1)
conv2d 적용 후 max_pool 적용하기
위에서 한 애용을 이어주면 되기 때문에 코드만 나열 한다.
import numpy as np
import tensorflow as tf
import matplotlib.pyplot as plt
import matplotlib.image as img

ori_img = img.imread('./image/teddy_bear.jpg')

fig = plt.figure(figsize=(10, 10))
ax1 = fig.add_subplot(1,3,1)
ax1.imshow(ori_img)

print(ori_img.shape)
input_img = ori_img.reshape((1,) + ori_img.shape)

print(input_img.shape)
input_img = input_img[:,:,:,:1]

print(input_img.shape)
input_img = input_img.astype(np.float32)

## filter : (3, 3, 1, 1)
weight = np.array([[[[-1]],[[0]],[[1]]],
                   [[[-1]],[[0]],[[1]]],
                   [[[-1]],[[0]],[[1]]]])

sess = tf.Session()

conv2d = tf.nn.conv2d(input_img, weight, strides=[1,1,1,1], padding='VALID')

## result = sess.run(conv2d)

pool = tf.nn.max_pool(conv2d, ksize=[1,2,2,1], strides= [1,2,2,1], padding='VALID')

conv2d_result, pool_result = sess.run([conv2d, pool])
print(conv2d_result.shape)
print(pool_result.shape)

ax2 = fig.add_subplot(1,3,2)
ax2.imshow(conv2d_result[0,:,:,:])


ax3 = fig.add_subplot(1,3,3)
ax3.imshow(pool_result[0,:,:,:])

plt.show()
