LabelImg (window+anaconda 환경)
다운로드 및 설치
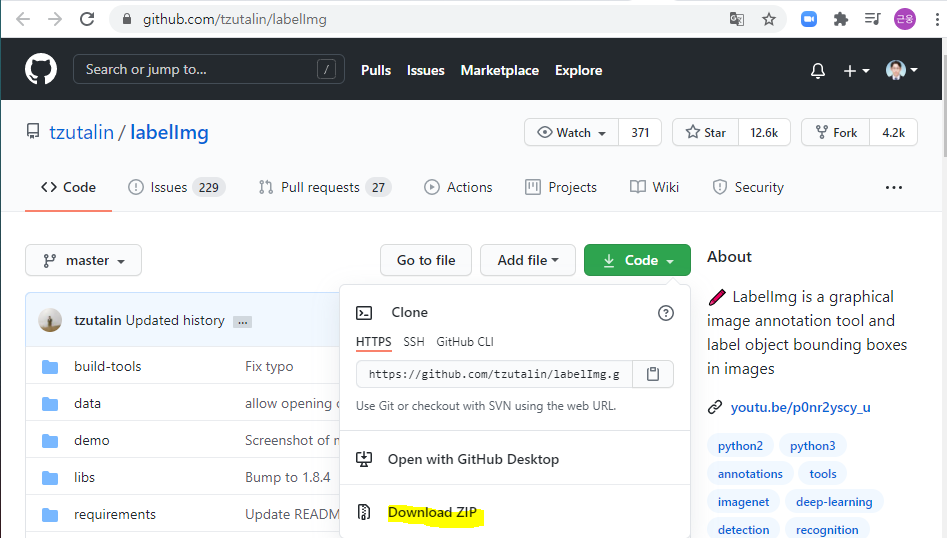
- https://github.com/tzutalin/labelImg 에서 zip 파일을 다운로드 한다.
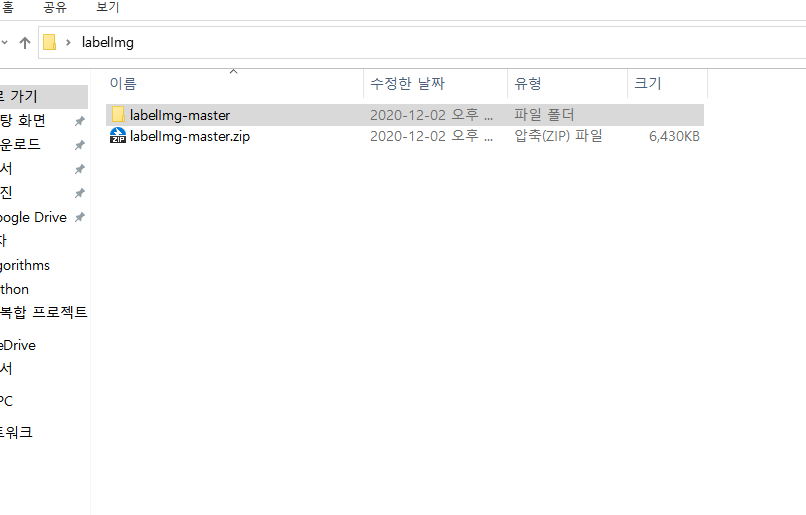
- 압축을 풀어준다.
-
anaconda prompt을 관리자 권한으로 실행한다.
-
만약 사용하는 가상환경이 있다면
activate 가상환경이름을 입력한다.
(base) C:\windows\system32>activate data_env_tensorflow2
- 경로를 설정해준다. 아래 노란부분을 복사한 후 가상환경에
cd와 함께 입력

(data_env_tensorflow2) cd C:\Users\User\Desktop\labelImg\labelImg-master
- 다음을 prompt에 입력해준다.
conda install pyqt=5
conda install -c anaconda lxml
pyrcc5 -o libs/resources.py resources.qrc
## 경로가 일치하지 않으면 당연히 파일을 못찾는다.
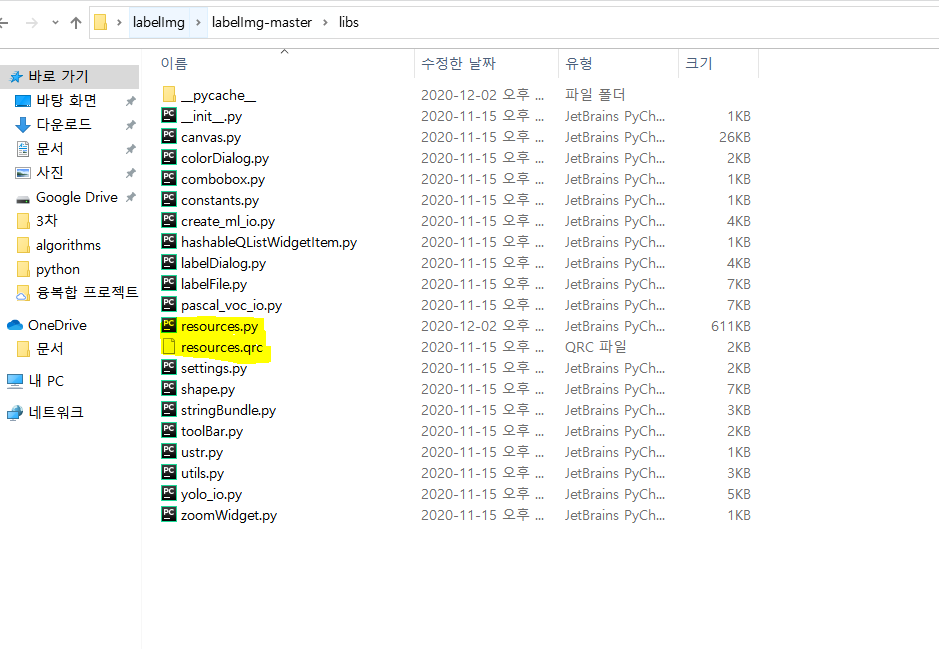
- 파일을 옮겨준다. (
resources.qrc는 굳이 옮기지 않아도 되는듯 함.)
C:\Users\User\Desktop\labelImg\labelImg-master 에 생성된 resources.py 와 기존의 resources.qrc 를 C:\Users\User\Desktop\labelImg\labelImg-master\libs로 직접 옮겨준다. (마우스로 드래그 해서 옮기면 된다.)
경우에 따라 resources.py가 이미 libs 디렉토리에 들어가 있는 경우는 옮기지 않아도 된다.
labelImg.py를 실행해준다.
(data_env_tensorflow2) C:\Users\User\Desktop\labelImg\labelImg-master>python labelImg.py
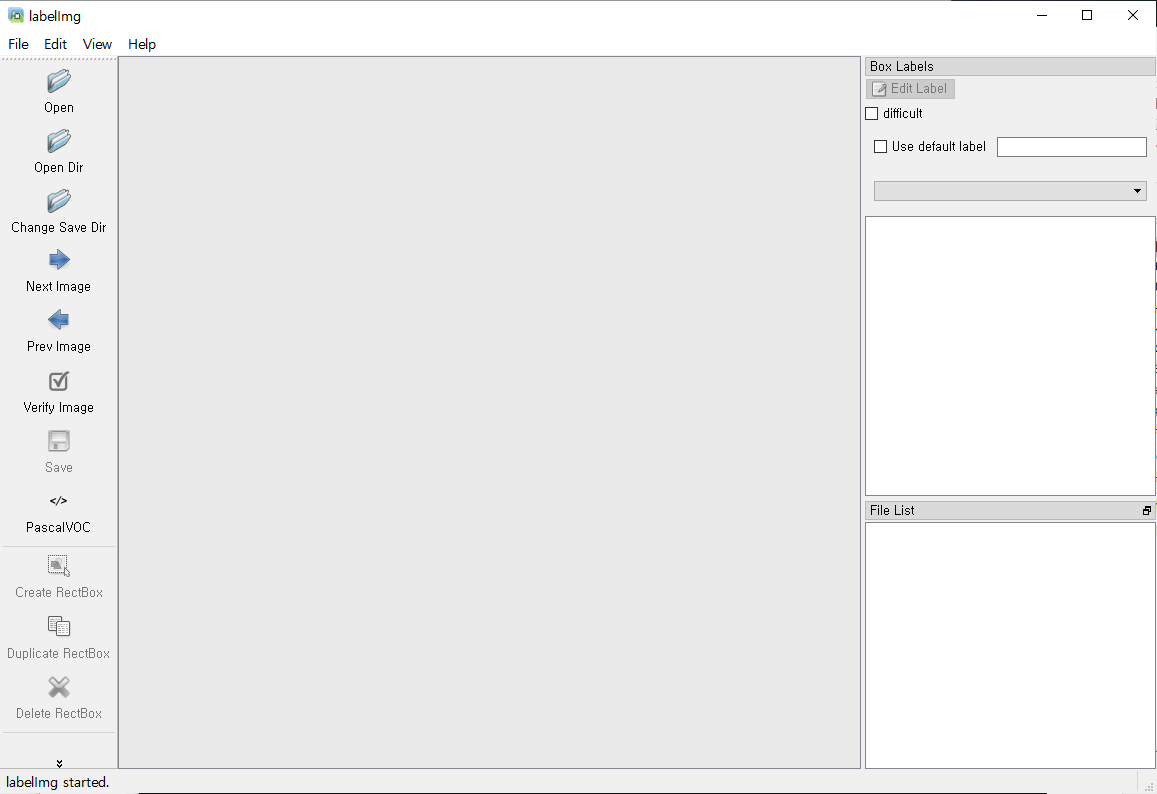
- 다음과 같은 GUI 가 등장하면 성공
단축키
| 단축키 | 기능 | | ——– | ———————————- | | Ctrl + u | 폴더로 부터 모든 이미지 불러오기 | | Ctrl + r | Annotaion target 폴더 default 변경 | | Ctrl + s | 저장 | | ctrl + d | 현재 Label 및 box 복사 | | space | Flag the current image as verified | | w | 박스 생성 | | d | 다음 이미지 | | a | 이전 이미지 | | del | 선택된 박스 삭제 | | Ctrl ++ | Zoom in | | Ctrl – | Zoom out | | ↑→↓← | 선택된 박스 움직이기 |